The Kodak Vest Pocket is not a rare or unknown camera by any means, they sold in their thousands and have been relatively well collected, documented and preserved ever since and, whilst certainly innovative, the technology used in the Vest Pocket range wasn’t particularly inventive. So far, so unremarkable, then? It could be argued that these cameras were perhaps some of the most significant image making tools ever created.
The Vest Pocket was the first camera that went to war and did so at scale. It’s launch coincided with the lead up to and outbreak of WW1. Owing to it’s extremely compact design and sheer ease of use, it became a sort of Goldilocks camera – the right type, with the right features at just the right time.
Never before had a large scale conflict been documented on film and by so many individuals from differing perspectives. Newspapers were prepared to pay not insignificant sums for photographs from “the front” and this caused huge problems for governments who were trying to control the narrative, propaganda and ultimately morale of a nation. Whilst there were various levels of ban on photography by soldiers, rules around amateur photography were fluid throughout the war and were either impossible to enforce or done so with differing degrees of leniency.
There were various motivations for soldiers to risk both owning and using a camera during the war. There were official war photographers on both sides, both aerial and on land but their job was certainly not that of photo journalism. Much photography was for tactical use, but some also for official release or use in newspapers. Some were angered by the fact that certain famous photographs were staged and didn’t show the true reality of the wartime experience. Others simply sought to make a record of their lives.
Amateur photojournalism didn’t usually capture the positive, jolly images of “Tommy” off to war to defend his chums back home. Instead, their images gave a remarkable insight into the gritty, utterly gruesome reality of real war. Many of these images now form some of the most important historic archives of our past and serve as a reminder that there is no glamour in conflict, and despite how we may dress it up today that war is still war. The lessons of our past are still there if we care to look at them.
Remarkably, nearly all of this historic material is because of one compact Kodak camera.
Buying a Vest Pocket today
Over 100 years after their initial launch, a great deal of Vest Pockets still survive and are readily for sale which is testament to their design and build quality. Made of a lightweight metal shell covered in leather, they are sturdy but prone to bellows failure and corrosion depending on how they have been stored. Bellows failure isn’t specific to Kodaks, any bellows camera of a reasonable age will have suffered a drying of the leather that leads to cracks and pinholes. Sometimes it’s obvious if these failures are present, sometimes it is down to the honesty and knowledge of the seller or simple pot luck.
Buying a vest pocket isn’t the kind of problem for your wallet that you might think it would be – prices are very reasonable. Running it, however, is another matter entirely as we’ll see. Depending on condition, Vest Pockets begin at anywhere from £5 and go up from there. Original Vest Pockets are slightly rarer it seems and the vast majority of cheaper cameras are the Model B variant. These are more than possible to pick up in reasonable, working condition for £25. Boxed cameras are available from £50 upwards if you’re into collecting.
However, Vest Pockets owe a lot of their diminutive size to the fact they use a very small film format. I’d always made the assumption that all roll film is generally quite large, as big as 120 at least anyhow. The 127 film used in these cameras is absolutely tiny by comparison and is hardly taller than a 35mm cartridge. It is small wonder that you only get 8 shots to the roll, there’s no space for any more film when you’ve got such little room.
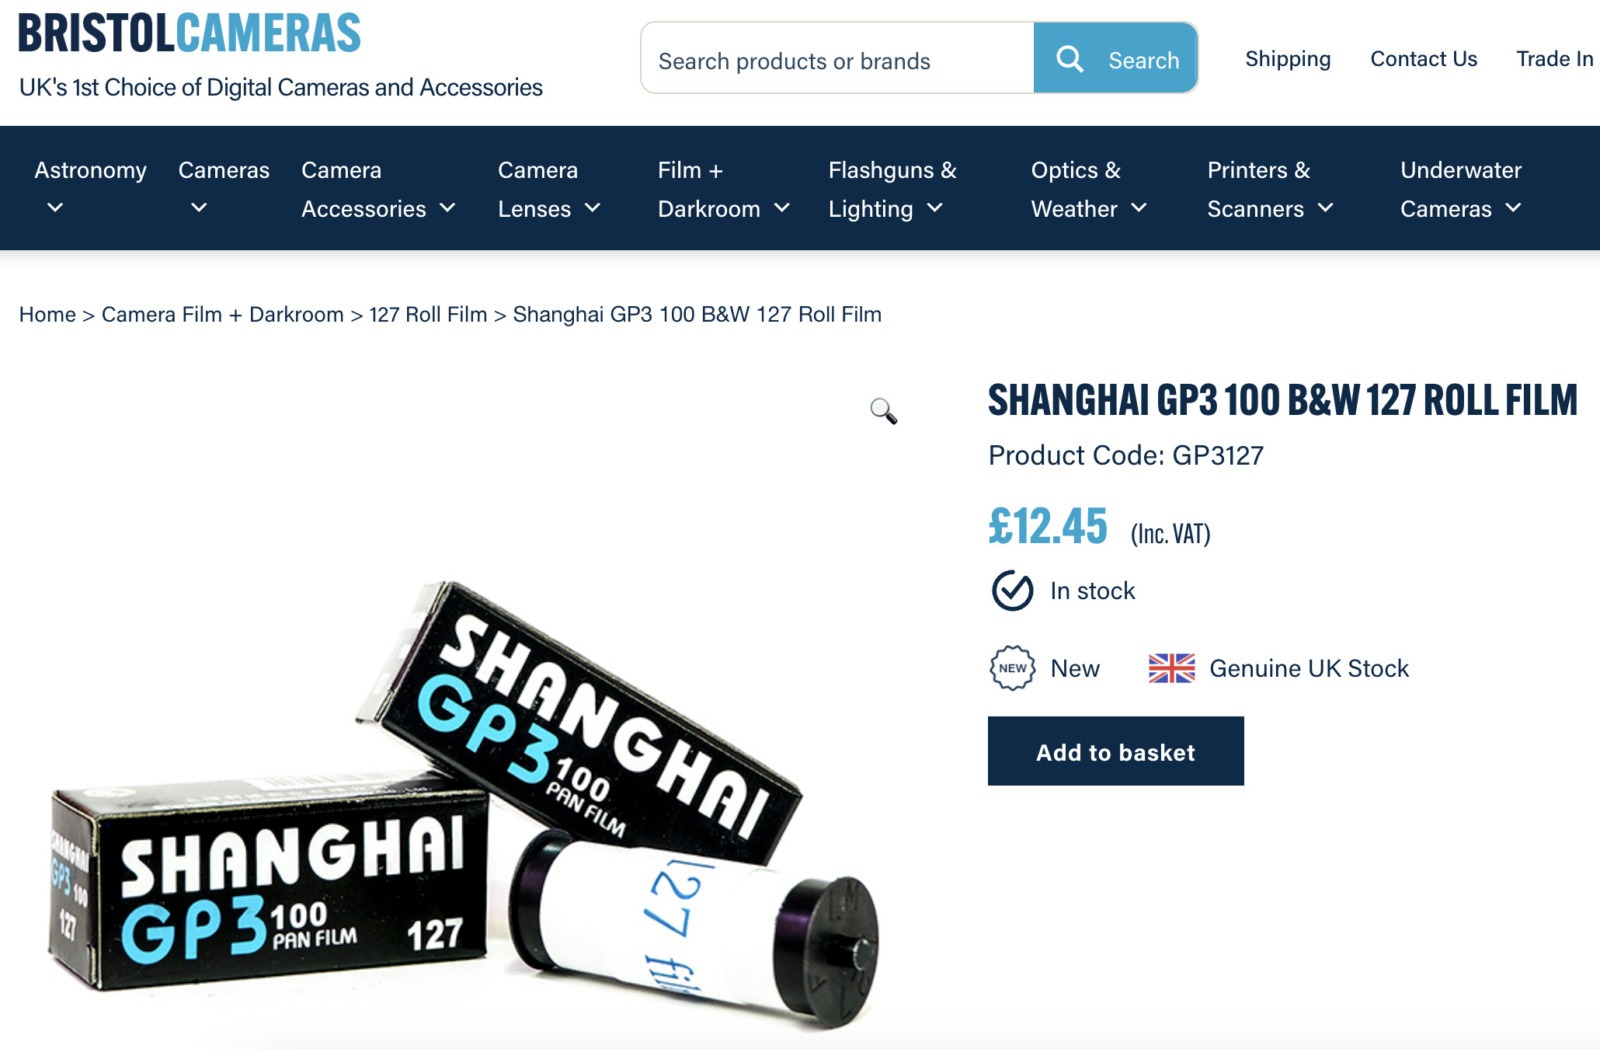
There are few places which sell less common film formats like this and fewer still that actually have any in stock. I eventually settled on Bristol Cameras who are an excellent retailer that I’ve bought quite a few bits and pieces from in the last few years. Their prices are reasonable, delivery is fast and I’ve never had a problem with them. They also happened to have the cheapest 127 film I could find, the Shanghai GP3 pictured above. Amazingly, it is cheaper to buy from a retailer than directly from the manufacturer. I’m not sure how that’s possible, but there we go.
I bought two rolls at £12.45 which totalled £27.90 including postage. At a lowly eight pictures per roll, using a Vest Pocket today costs you no less than £1.74 per image. That’s not cheap and to put it in some kind of context, Instax film works out at £0.75 per shot and that instantly develops itself too as a nice added bonus.
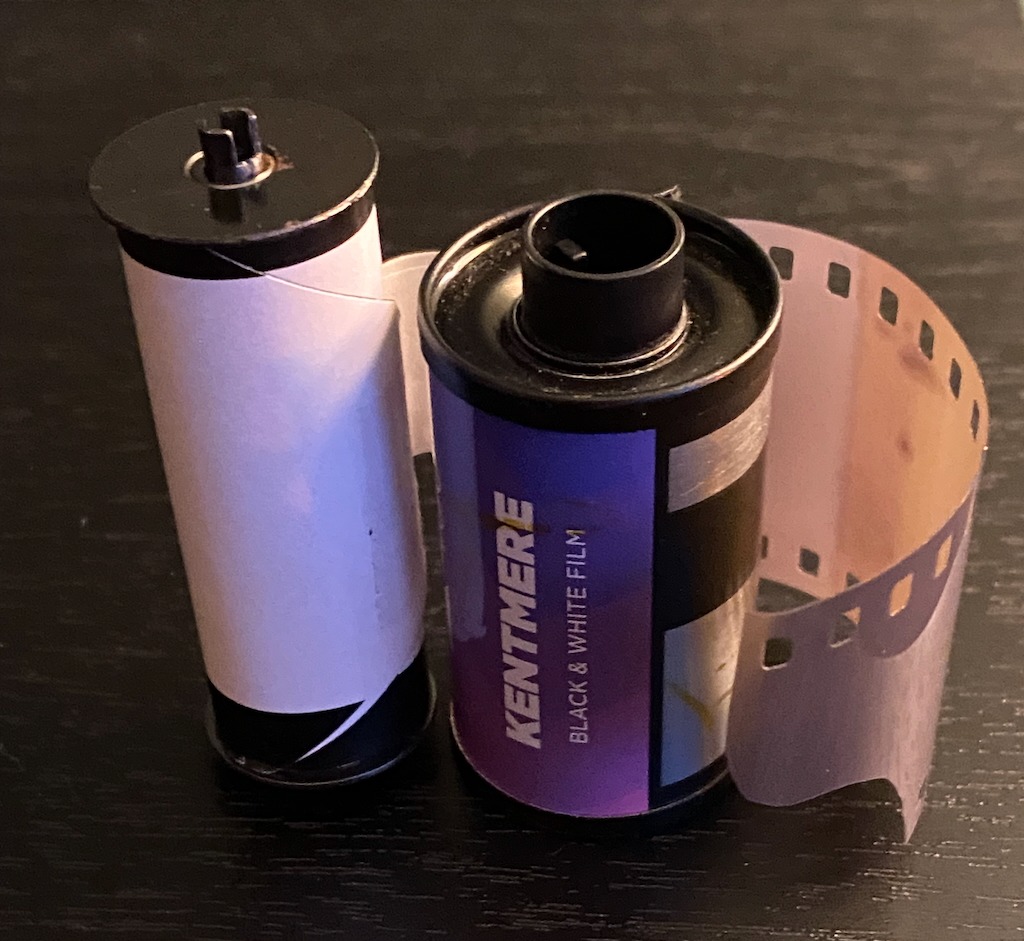
I’ve kept the paper from my rolls of film as I think a more viable alternative is probably to sacrifice a roll of 35mm film and simply stick it to the backing paper. The frame size isn’t hugely small, you’ll get lovely sprocket hole pictures and I’d estimate it’s possible to squeeze three rolls of 127 length film out of a 36 exposure 35mm film cassette. The one thing I’m not sure of is how to keep it straight on the backing paper whilst loading it blind – I don’t have a light tight space I can work in other than a changing bag. Something to practise with an old film first!
Light restoration…
I didn’t do a huge amount of research into the Vest Pocket before diving into eBay and lining up a number of contenders that weren’t expensive but looked like they could at least be rescued. A lot of these cameras have had a hard life and nearly all of them are a hundred years old or more – it would be unreasonable to expect anything to survive that long and still be in excellent condition.
The biggest cause of failure is the bellows being damaged and many for sale do have quite obvious problems. Some simply haven’t been folded back up correctly, others are flaking to pieces with little chance of restoration short of a brand new set of bellows which is not a cheap prospect. Leather doesn’t like being dried out, folded up and then kept in conditions where it cycles between warm and dry to cold and moist. Whilst the outer leather of the camera doesn’t really matter at all, the bellows are a deal breaker.
I settled quickly on one of the slightly later models due to it’s nicer lens, better shutter mechanism and overall looks. Some of the very early Vest Pockets, in my opinion, are really unattractive designs. The way a camera looks obviously doesn’t matter one bit in terms of the images it will produce, but I genuinely do appreciate a well thought out and elegant design. However, the camera I purchased was clearly going to need some work doing to it if it were to be used rather than placed on a shelf as an ornament.
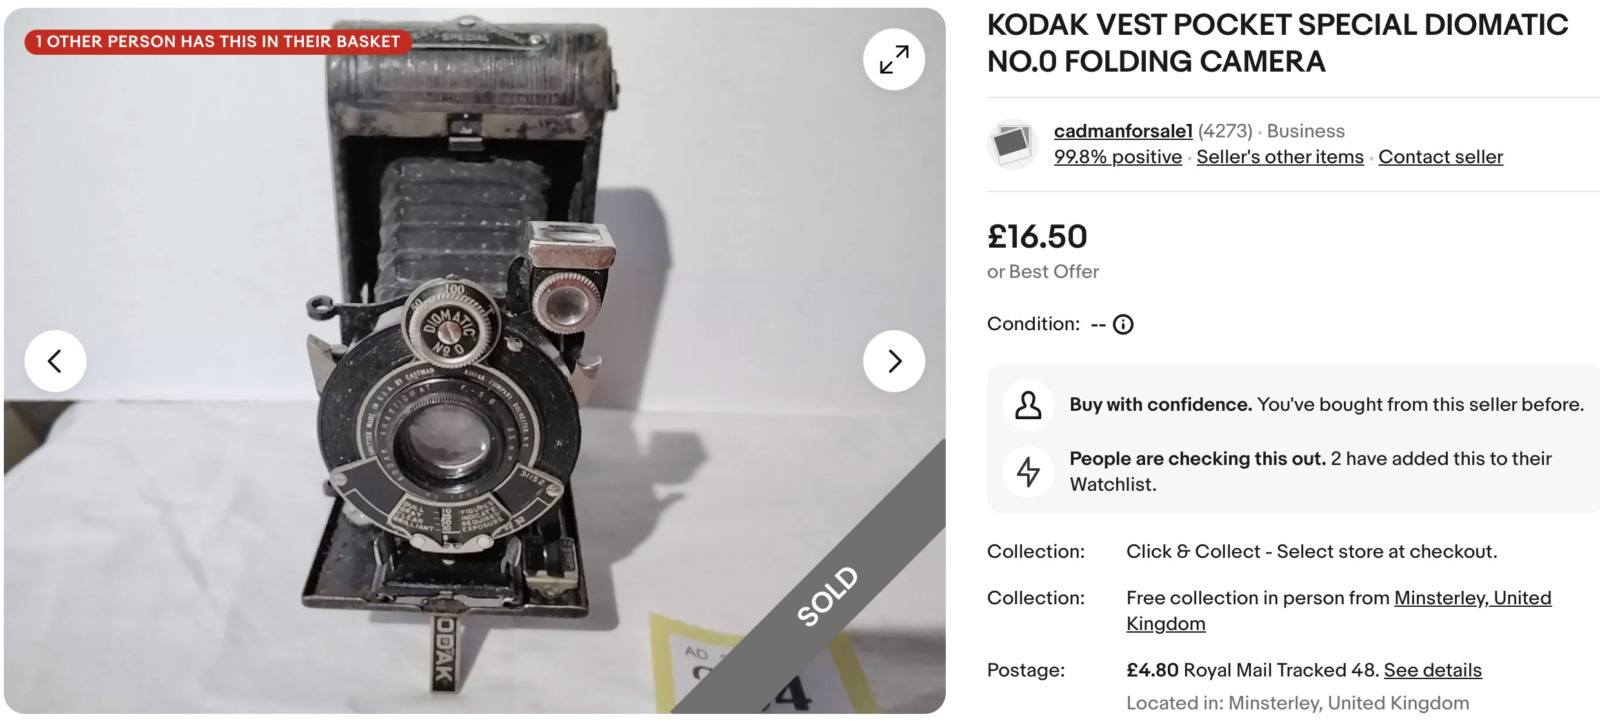
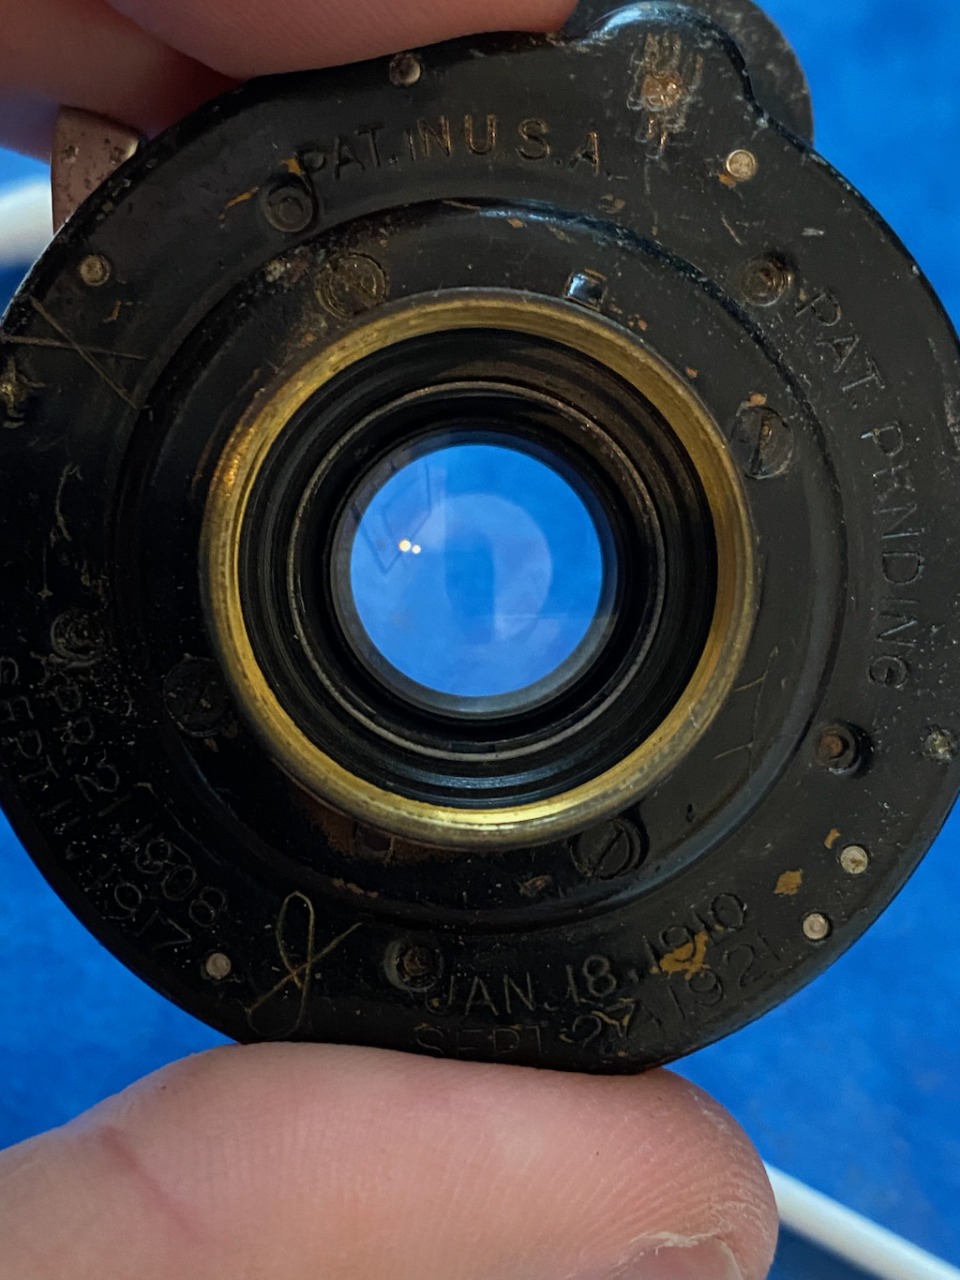
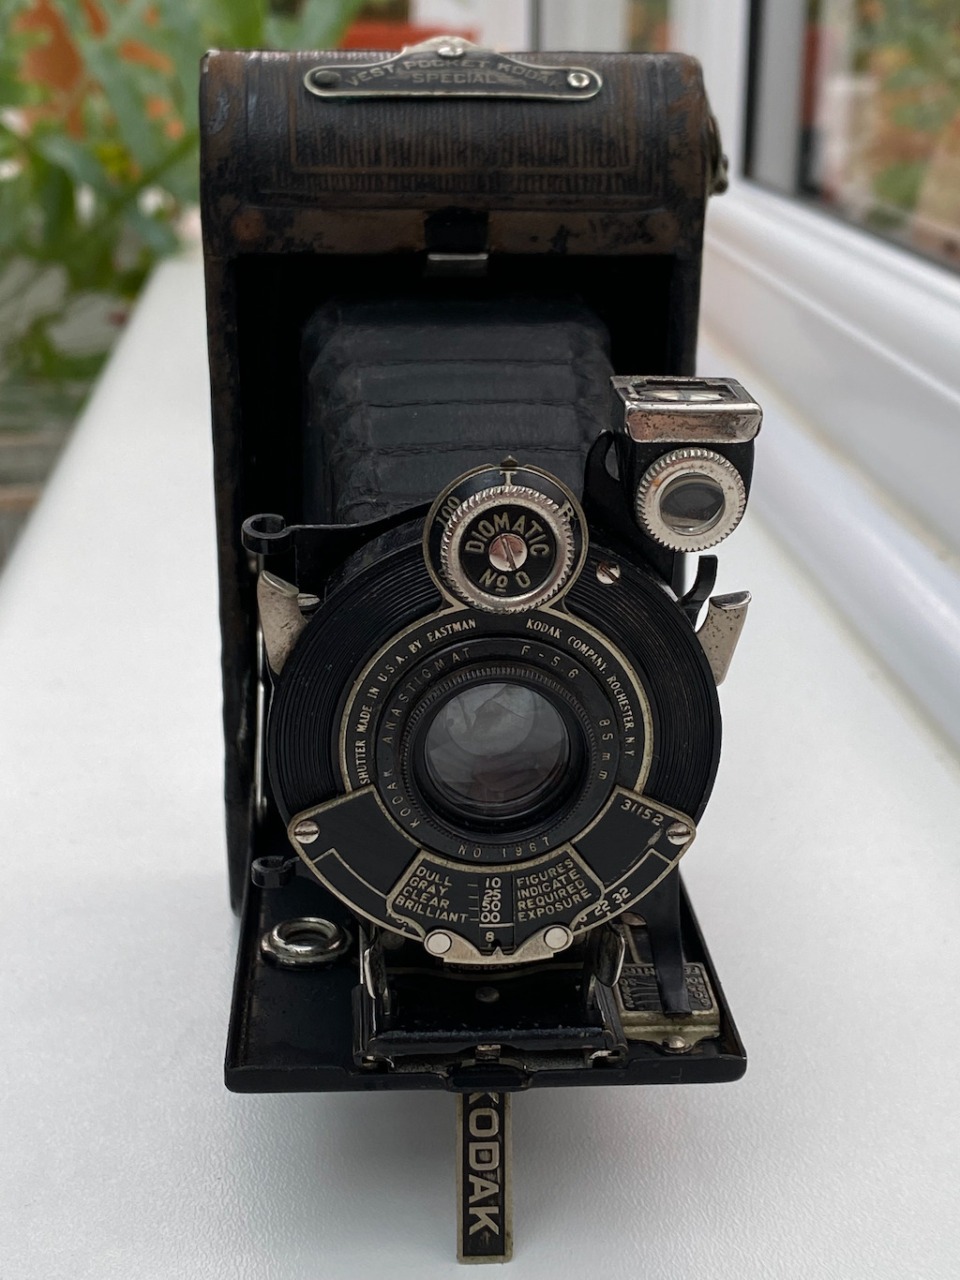
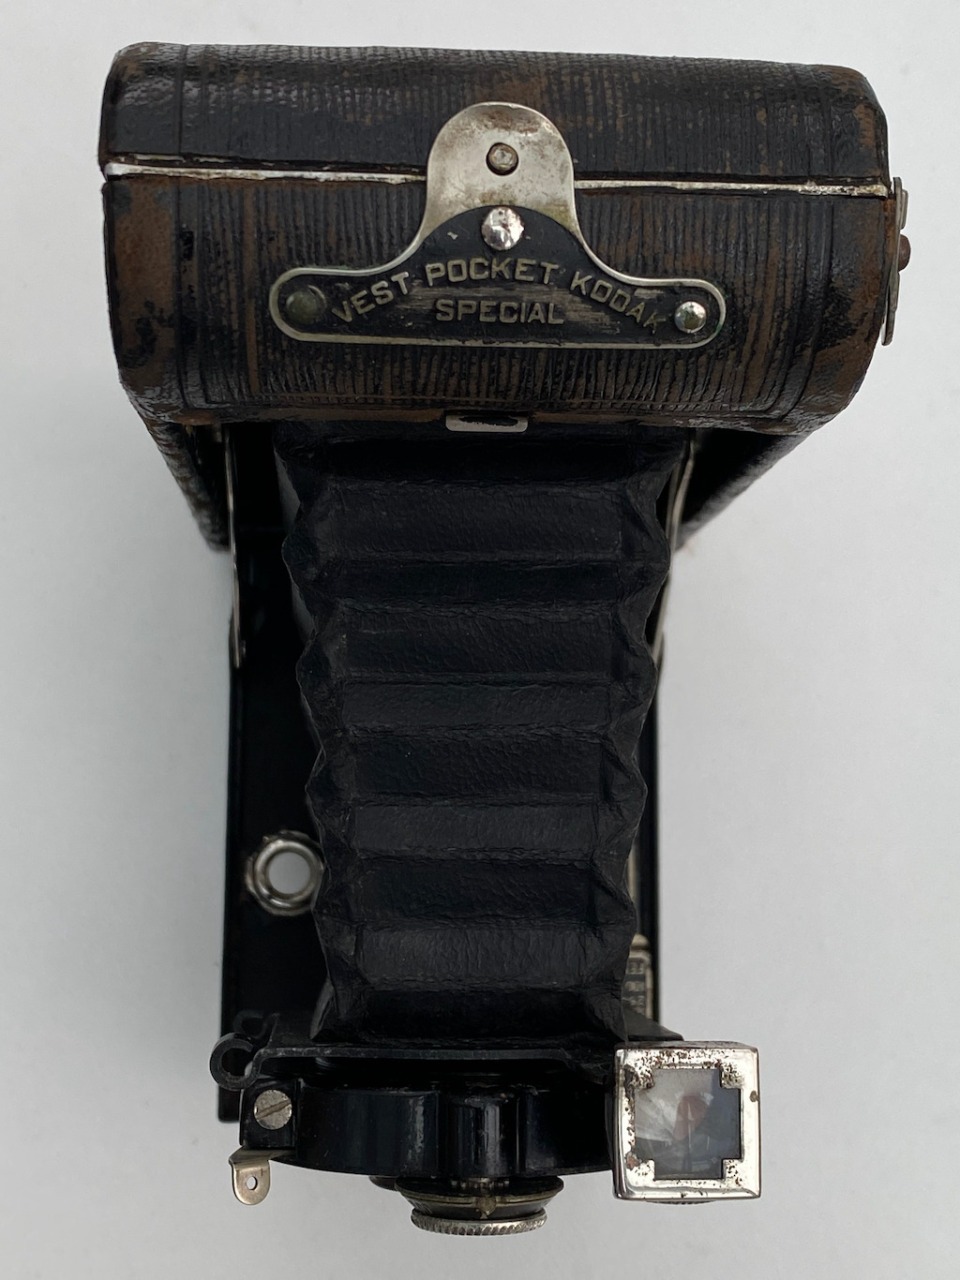
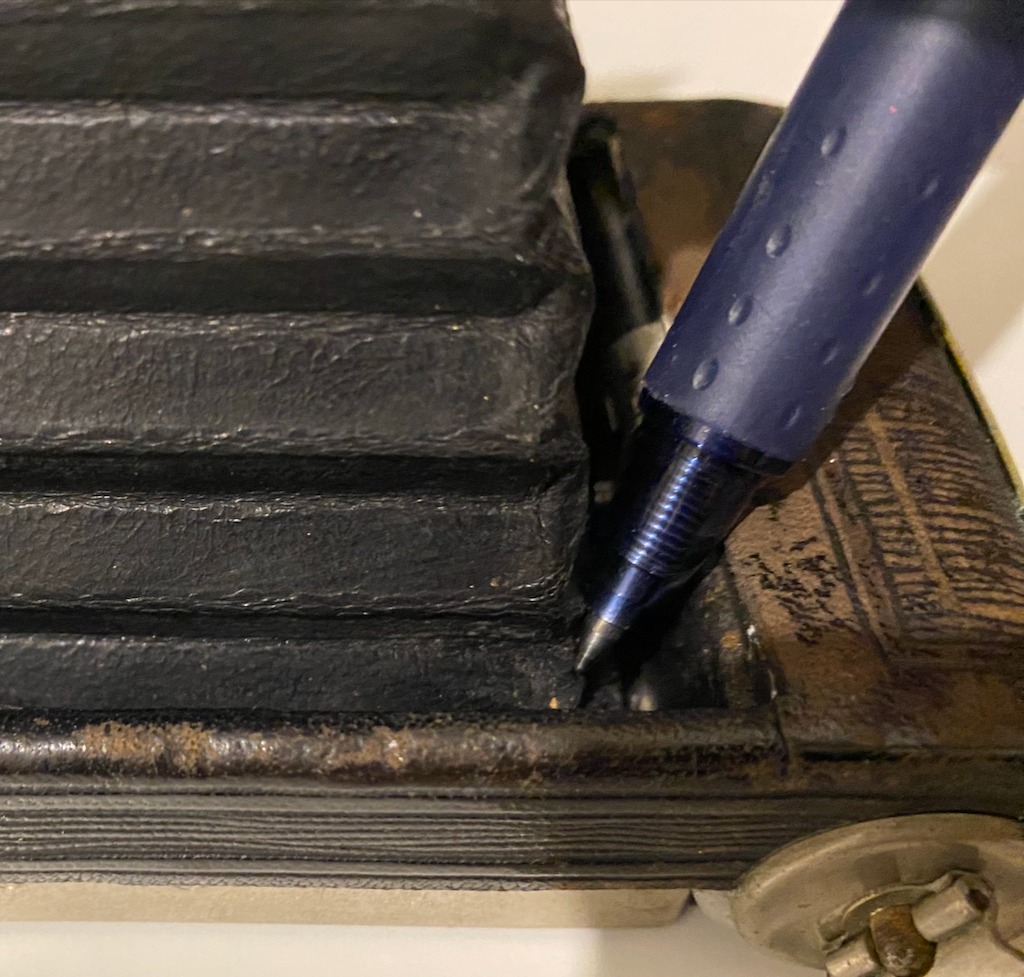
The exact model I have is somewhat confusing. According to the nameplate, it is a “Vest Pocket Kodak Special.” The special part refers to the fact it has a nicer lens/shutter combination, apparently. It is also an “autographic” model, which means it has an incredible innovation for the time – a small door on the back can be opened and, using the included metal scribe, you can write a message directly on the back of the film. This is then left open in the sun and it “develops” the message on to the film. You cannot buy this film any more, but it does explain the number of old photographs you see with white writing on.
The back of my camera says it is a “Model B” but it looks like no other model B I can find on the web anywhere and has a vastly better shutter and lens than any model B I’ve seen. Furthermore, the model B had a different back and film loading mechanism than my camera does – so this doesn’t make sense.
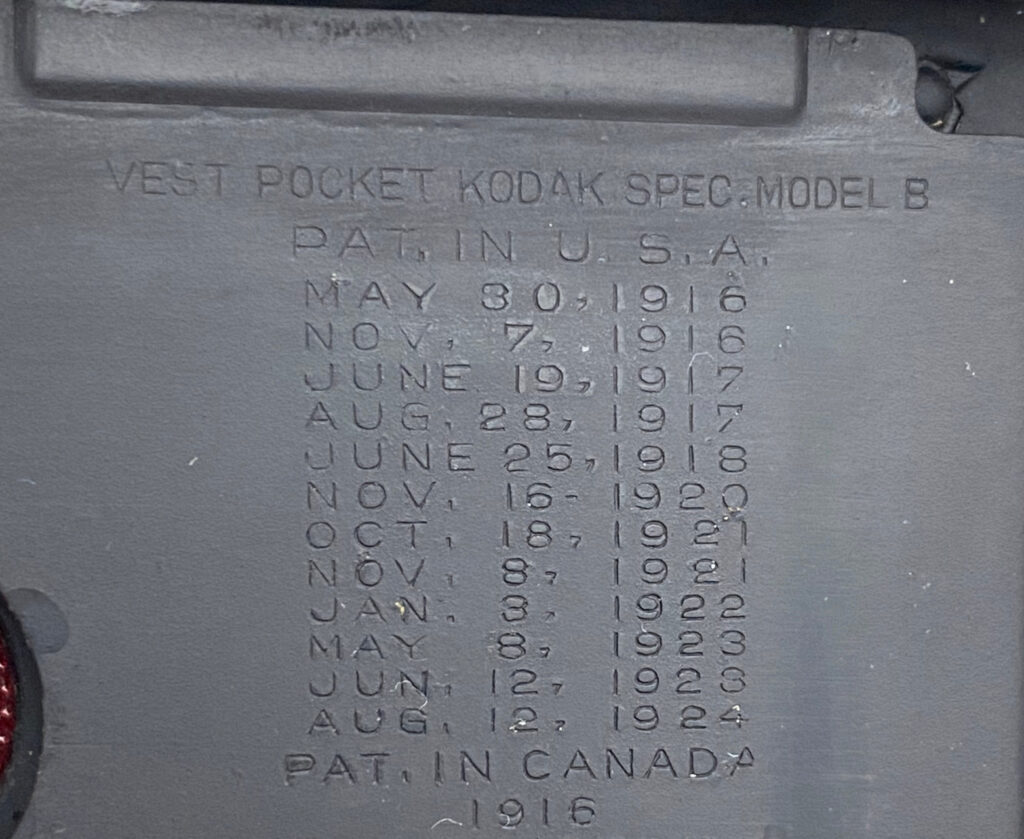
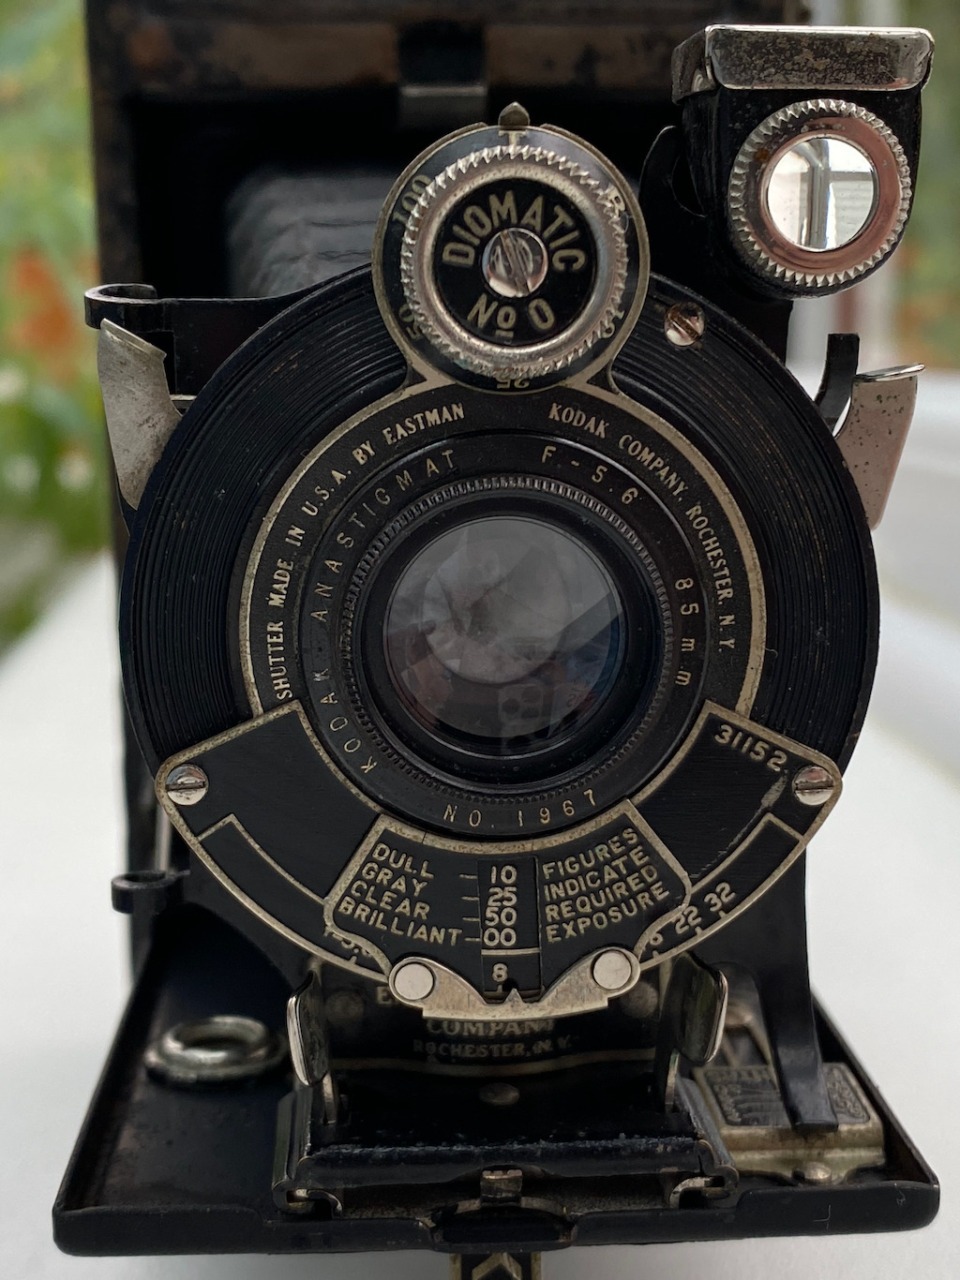
I then thought I might have a Model 3 – the shutter was definitely sold on those cameras as I could find it in one of the manuals for that camera. Apparently, the F5.6 lens on my camera was something of an upgrade and not standard. However, looking closely at pictures of the Model 3, my camera doesn’t match those either! I’ve read through the excellent “Red Bellows” website and there appear to have been lots of subtle variations depending on the market and customers could also request various changes and upgrades when they placed an order so it isn’t too surprising that I have a camera that is probably a Franken-camera made up of different model parts.
All I can be sure about is that the camera dates to 1924 at the very earliest, probably 1925 and going on the serial number is a very early model in the production run. Either way, what turned up had the potential to be a really nice camera, but there was a reasonable amount of work to be done.
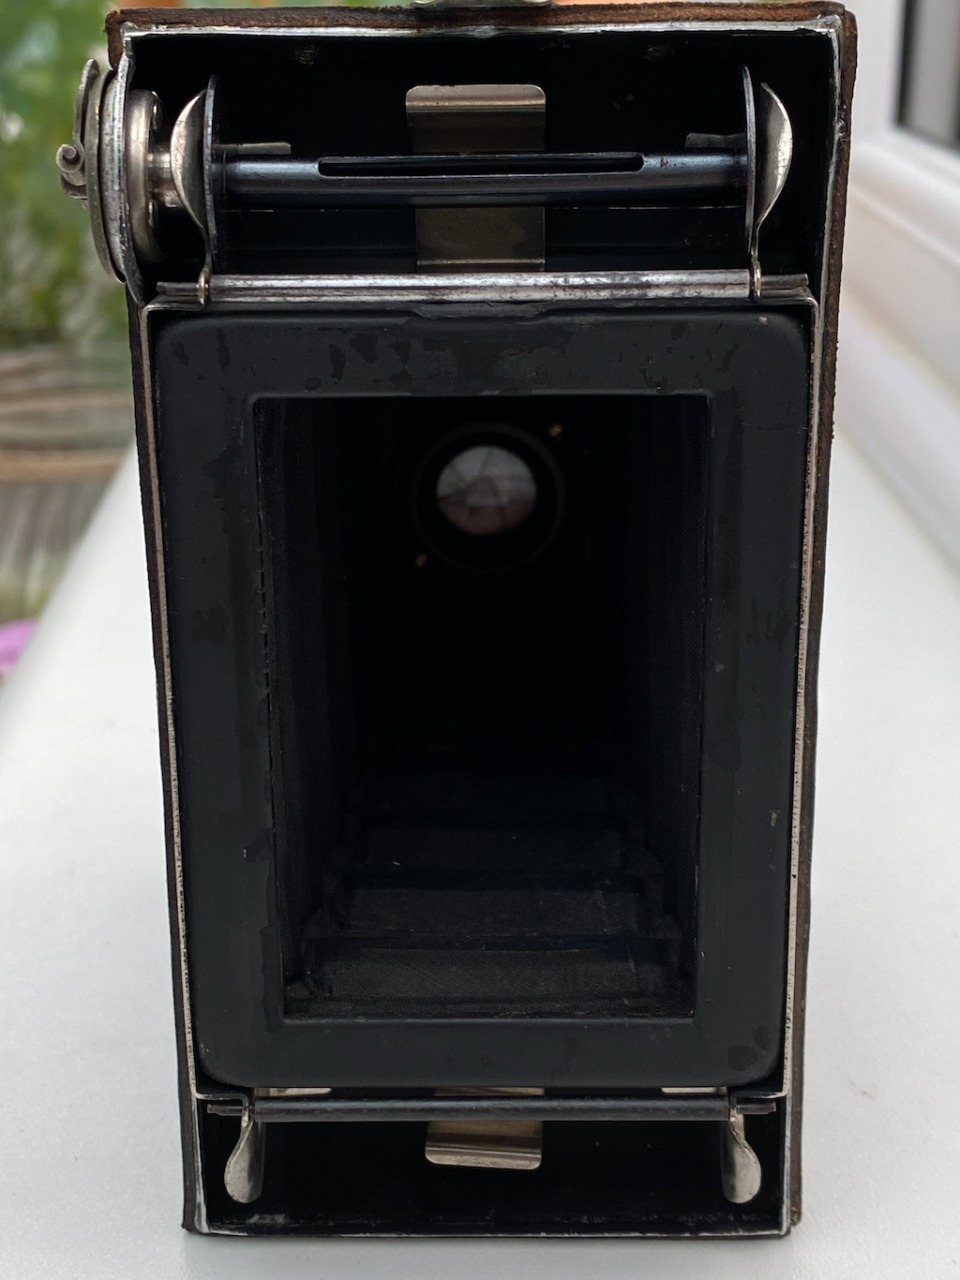
If you’ve not seen one before, the first thing that strikes you about the Vest Pocket is just how small they are. I get that the clue is in the name, but compared to a 120 roll film folding camera, they are truly tiny – your iPhone is bigger than this camera. In photographs they look big, just like those 120 cameras, but the difference in reality is remarkable.
Mine was small, mouldy and particularly dirty with some interesting lens fungus that needed sorting before it could be used. Remarkably, the shutter worked perfectly and from what I’ve found from reading the experiences of collectors this is not that surprising with one source describing Kodak shutters as “virtually indestructible.”
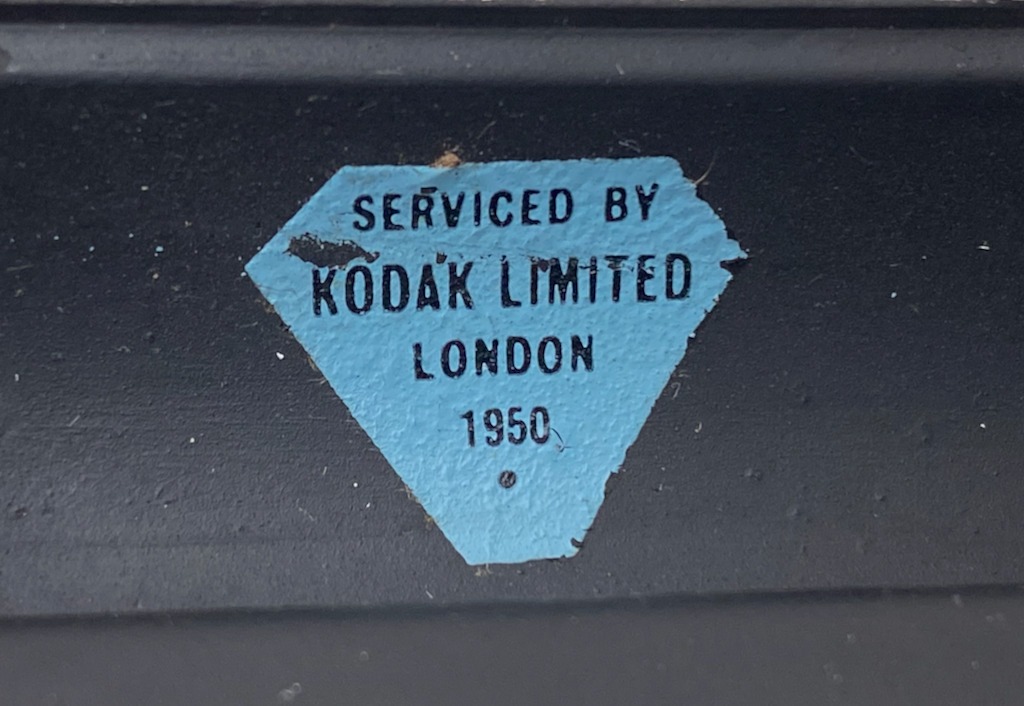
The camera was covered in flaky paint, surface rust and general dirt and grime that had accumulated over the years. According to a sticker in the back cover, the last time this had been serviced was 74 years ago at Kodak in London. The fact we know this is great provenance but also shows that this particular camera had not only been really cared for, but used for well over 25 years at least. That’s one hell of a run for a camera like this. I guess that not only were things built to last, but were also treated with great respect, care and attention.
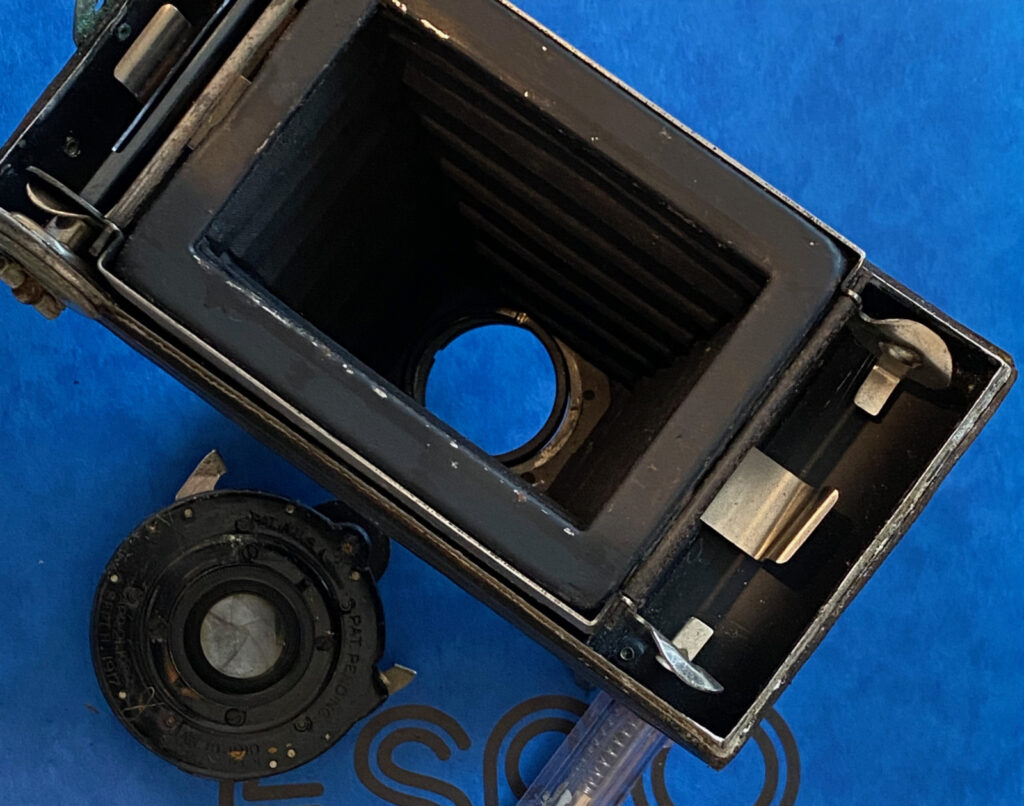
Somewhere between 1950 and now it has obviously spent a great deal of time unused, probably in a cupboard with a fair bit of moisture about going by the mould that was all over the bellows. These cleaned up nicely with an alcohol and water bath but the lens was another matter entirely. After stripping down the elements and bathing them in a mixture of Ammonia and Hydrogen Peroxide to kill the fungus they were significantly improved, although some of the glass around the edges of the rear elements is beginning to degrade beyond repair.
I spent a significant amount of time cleaning scale and surface rust off almost every surface of the camera and paid particular attention to the film rollers and mask. Undeveloped film is incredibly fragile and the smallest imperfection, pitted metal or rough surface with cause scratches in the emulsion. After some serious polishing, they felt smooth – to my fingers at least.
Finally, I touched up some of the roughest areas of black paint to tidy things up, reattached the lens, blew everything out and glued down some of the leather which was beginning to peel. I stopped short of a full restoration because it felt like a camera this old should look its age – it would be unnatural to turn it into something which looked fresh out of the box. Not that I possess the skills to do such a thing anyway.
 |  |
 |  |
…Light leaks
It was finally time to load the camera up and put a roll of film through it for the first time in God only knows how many years. Suffice to say, I learned a lot about using the Vest Pocket in just those eight frames. The first shot, I completely forgot to focus the camera, which is more of a problem than I’d first thought.
Focussing is carried out by physically sliding the lens back and forth whilst looking at a marker against a distance scale on the left side of the lens as you look down at it. This scale is no longer than 1cm and changes focus from 100ft down to just 6. If you pull the lens fully out as you do when you first open the camera, it’s way beyond the minimum focus distance. It is strange to get your head around the fact that moving the lens backwards actually makes it focus further away rather than closer to a subject. That depth scale does seem to be very accurate and in subsequent frames where I checked and estimated distances, they all came out perfectly in focus.
Other than remembering to focus, the camera is very easy to use unless you’re in particularly bright conditions. The position of the light makes every difference as to whether you can see anything in the viewfinder. Sticking up on the top left of the lens is a quaint little set of lenses and mirrors that looks something like an old lantern. This forms the framing guide and viewfinder, but it is no larger than around 8mm square and depending on how you look at it, or how bright the conditions, you can see either a tiny representation of the final frame to be captured or… nothing at all. I couldn’t get to the bottom of consistently working out what caused such problems with the viewfinder as sometimes it works just fine, others it can be next to impossible to frame an image. One thing I can say is that when you can see it clearly, it is highly accurate.

Winding the film was at times quite difficult and I do wonder if that caused some of the issues seen in the developed negatives. Two things would happen – either the winder was slightly (but not alarmingly) stiff, or it would lift up in the way it would when you remove or load the film reel. During testing, I’d not come across these issues and it would’ve been difficult to diagnose anything like this before running real film through it as I didn’t have any old or spare 127 film reels to try it out with. We live and learn!
Three things became apparent with the first roll – something rough had scratched the first four frames (but then disappears in later frames), the lens has damage which causes black speckles to appear on the final image and, most pressingly, there’s a light leak in the bottom left corner.
I couldn’t for the life of me see the light leak through the inside of the bellows so I stood inside a cupboard (don’t ask) and shone a light through the back of the camera. There, in one corner of the bellows, was the smallest pinprick of light shining back at me in the dark. I couldn’t believe it and also couldn’t believe I hadn’t had the common sense to check for this before loading a roll of film.
The speckled lens I can live with, but the light leak definitely needed to be sorted. There are so many methods suggested in various forums for how leather bellows should be repaired and any one of them would’ve been reasonable for such a small hole. The only method I wasn’t taken with was the suggestion to use silicone sealant and a needle to drag it through the hole. Other methods included paper tape, duct tape (is there anything it doesn’t fix?) and one I’d never heard of before – liquid electrical tape. I’m not surprised this isn’t widely sold in the UK as I doubt for one second it would be allowed for its stated purpose, but for repairs like this it sounded like a decent option – tough, flexible, black and easy to apply. I ordered a tube off eBay and waited for it to turn up.
One other thing that needed some work was the final shot on the roll. I think that during the final wind, with the red window uncovered at the back of the camera, the light gets in and destroys the final image as the paper curls slightly. That’s the only explanation I can think of for the absolute disaster that appeared at the end of my first roll.
Second roll, new problems
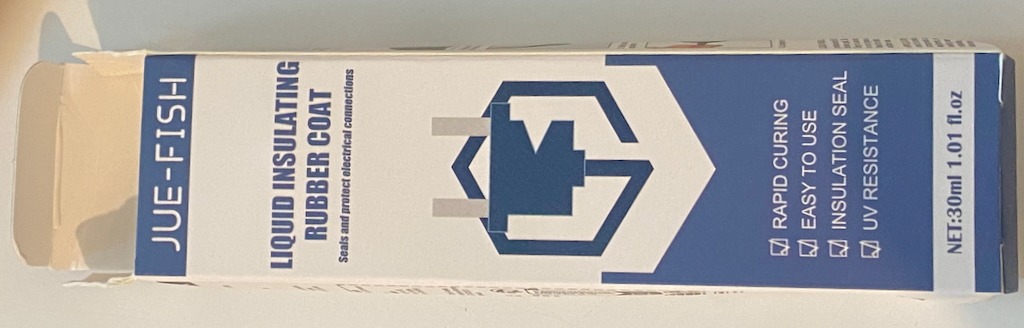
Having bought some extremely high quality “Jue-Fish” rubber coating I set about repairing the tiny hole in the bellows. This stuff is not easy to work with at all as it is quite viscous and didn’t adhere to surfaces easily. The packaging suggests you can use a brush to paint the material on to a surface but all I succeeded in doing was attaching a blob of it to the end of a brush that it steadfastly refused to leave. In the end I resorted to the nuclear option and carefully (horrendously) applied it with the end of a finger. This worked, but I was scraping black rubber off my finger for the best part of a day afterwards.
Once dry I tried the light test in a dark cupboard once more and the leak did seem to be completely fixed. I then set about trying to eradicate any bumps or rough surfaces that might have cause the film scratches seen previously. I used a rotating multi tool with a variety of polishing bits on the film rollers and film plane itself and couldn’t feel any rough edges with my fingers. This was as good as it was going to get with the tools, skill and experience I had available and so it was time to load the second roll of film and see how things went.
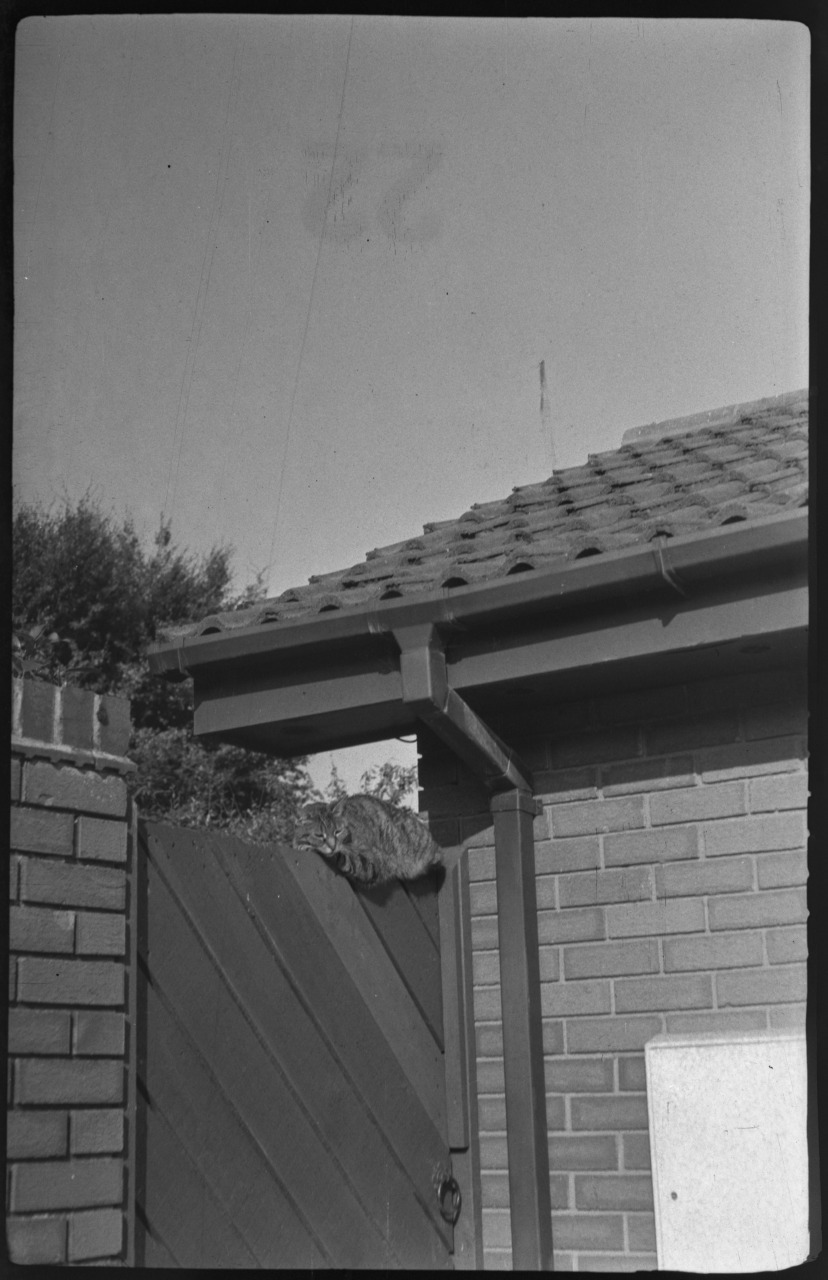
This time I was determined to eliminate as many potential faults as possible. I loaded the film in subdued light as carefully as I possibly could. Next, I covered the film counter window on the back with aluminium tape rather than electrical tape as I did last time – the idea being that this should be entirely light tight. I also made sure that on the very last frame of the roll I didn’t leave the window uncovered so I could be sure there’d be no light leaks at the end of the roll. Apart from these things, I couldn’t think of any other things I could possibly do to improve outcomes. A roll in and I’d learned to remember to focus and double check all settings before firing the shutter. This should definitely be a better roll.
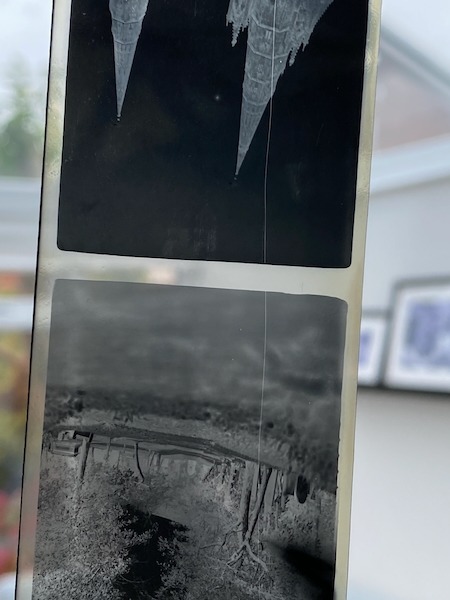
I tried everything. When loading the film reel I took extra care to handle the film as gently as I could, I stand developed to avoid shaking it about in the tank too much and what came out was some significant scratching. What baffles me the most is that the line isn’t straight, it goes diagonally across the first four frames and then disappears. This is either some rogue bit of dirt which migrated as the film was wound, or something I haven’t quite figure out yet, but what it can’t be is a sharp edge in the camera itself, that would be straight!
What’s even more weird is this:
No, you’re not imagining things, that’s the number 22 floating upside down in the sky.
For those of you unfamiliar with roll film, the film itself is taped to a backing page which is impervious to light and on the back of this are numbers which can be seen through a little red window in the back of the camera. This is how you know how far to turn the advance winder for the next frame, unless you have a lovely posh TLR like the Yashica which took care of this for you.
I’ve literally just gone and stood back in the dark cupboard and tried to shine a light through the very backing paper which caused this issue and it is completely light tight, not a photon of light is escaping through that paper. How did it happen, then?
Your first instinct might be that the light really was getting through the back of the camera and “burning” the numbers onto each frame, however there are two problems with this. The picture above was not frame 2, it was frame 1 on the roll and second, in later images it is not just this centre number which is visible, but the outer numbers too – and they are not under the red window.

What’s actually happened here is called “ink transfer” and that’s exactly what you think it is – the ink has come off the backing paper when the film was wound on to the next frame and transferred itself onto the negative. Whether this is a stamp like action or something chemical I don’t really know, but it’s definitely what happened. The conclusion is that, despite being £12 per roll, the Shanghai GP3 film is… crap.
I’m beginning to wonder if this film was damaged from the factory. If it is possible for numbers to transfer off the backing paper then it is equally possible for the film to have been poorly loaded. Is this actually manufactured as 127 film or is it cut down 120 film? I think probably the latter and this may well explain some of the issues occurring here. The question is should I then try a more expensive roll of film to rule this out? Sadly, my wallet says that this is an extravagance I can’t afford right now.
Conclusions
I can see exactly why the Vest Pocket was a raging success in the 1910’s and 20’s. The design is superb and you need to see one in person to appreciate just how small they are. This is a camera which lives up to it’s name, it is in every sense a pocket camera. It must’ve been something of a revelation being able to walk around with a camera in your trouser pocket ready to capture almost any moment. For those with extremely deep pockets, I imagine that these cameras must’ve travelled the world with their owners.
There are many criticisms the modern user could level at these cameras, the primary one being the seemingly stingy eight frames per roll but it is important to remember that this was released during an age where glass plate cameras were still in use and you’d have considered anything more than one frame a luxury. The advent of roll film was a genuine game changer in terms of how useful, transportable and accessible photography was to the general public.
The one negative which does hold water is the viewfinder. The design is beautiful, it really is, but practically it is utterly useless. During both rolls I noticed some frames were quite accurate – I’d get roughly what I remembered framing up at the time. Others were way out and had a significant shift from the intended image that I wanted. The viewing angle is “straight on or nothing” and slight deviations of your head one way or another see’s the image just disappear.
This particular model of Vest Pocket is wonderfully tactile. Each control feels well made and it probably works just as well as it did the day it was made. The shutter is easy to use and has just the right range of shutter speeds, even for modern films – ISO 100 is very, very fast compared to film that would’ve been available during the 1920’s.
The most revealing testament to this camera is that its original owner (or subsequent owner) saw fit not just to continue to use it into the 1950’s, but to pay to have it professionally serviced by Kodak themselves. It would be reasonable to assume that the same person went on to use this camera for a period of time after this. Who knows when they finally gave it a well earned rest, but imagine today buying a camera and still using it thirty or so years later. The proposition is truly bonkers in the modern world.
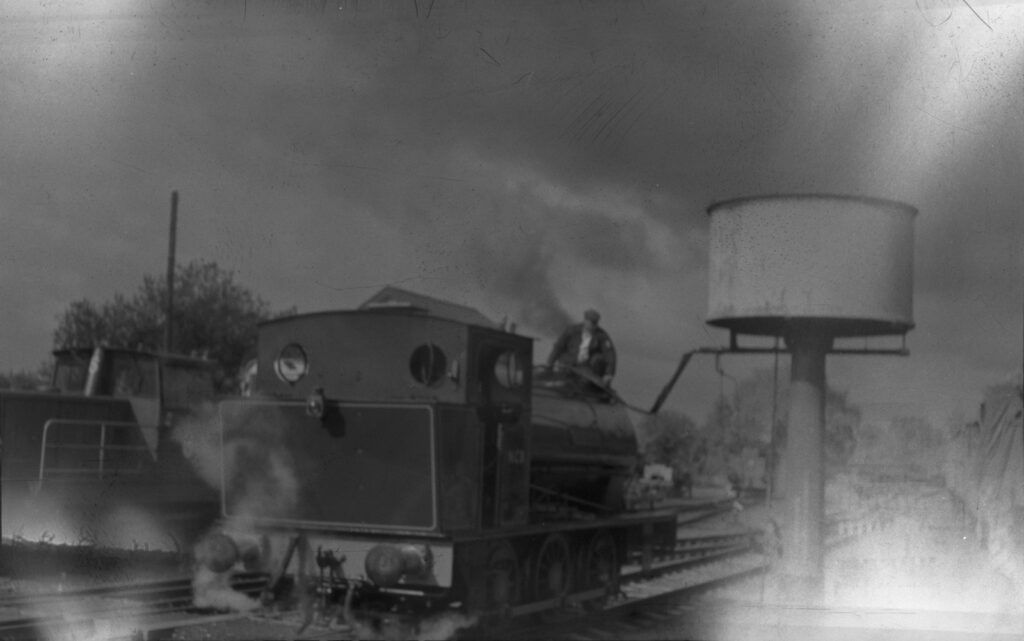
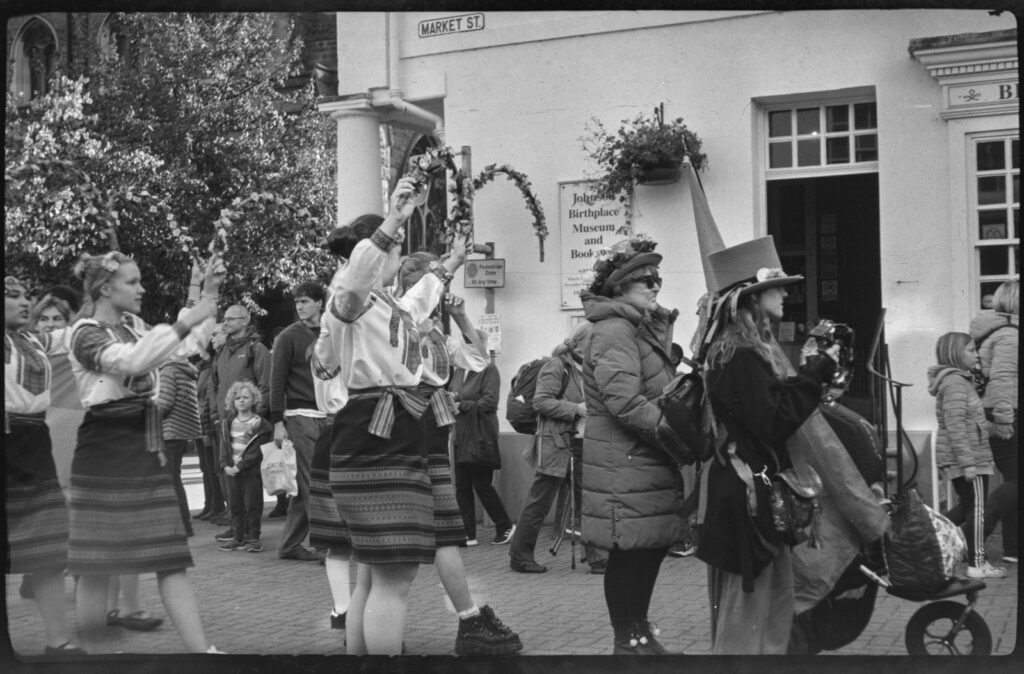
Using a camera like this and then picking up a later SLR is really rather humbling. On the same day I visited a local steam railway, I had my Canon A1 with me that had a film in which needed to be finished off. Once I’d run a roll through the Vest Pocket I switched to the A1 and it struck me instantly just how absurdly easy it was to use. It’s like time travelling, you find yourself wondering how anyone ever managed with older cameras and then how they must’ve felt upgrading to one of these machines. I’ve said it before, but you really don’t need anything more than an A1.
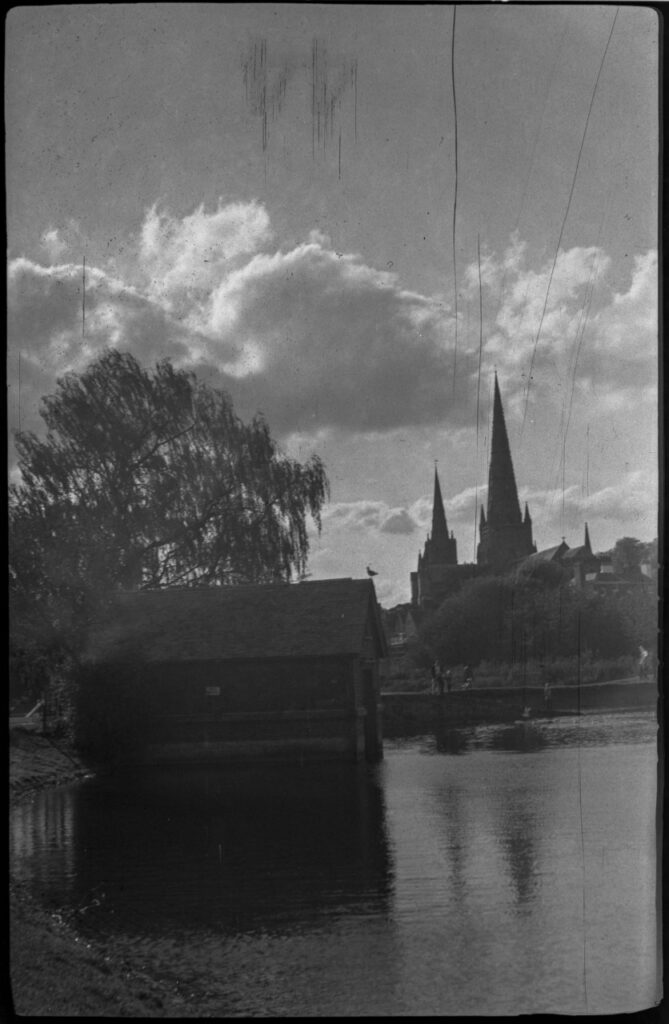
So what have I learned? Well, I liked the Vest Pocket a lot more than I thought I would and they are capable of producing some quite brilliant image quality in the right circumstances, even if you do have a speckled lens and rubbish film like I did. Their compact form gives you the best of the bellows type experience with modern day convenience. One thing which puts me off using larger cameras like the Voigtlander Bessa are just how bulky they are. Portability really was the killer feature of the Vest Pocket.
I love the heritage of these cameras and we have them to thank for some stark and chilling reminders of the reality of the Great War. Without Kodak, all that would’ve survived would be glass plate press images and they would’ve been censored or set up in so many instances. The historical significance of the Kodak Vest Pocket simply cannot be underestimated.
Should you buy one today? That’s more difficult. I think if you want the best experience you should buy from a reputable seller or specialist dealer that really know what they’re doing. That way you’ll guarantee working, light tight bellows and probably a shutter and lens that has been checked or serviced. A clear lens would’ve made the world of difference to my final images, even though they’re a lot better than they might have been if I hadn’t sorted the fungus.
There is, however, no escaping the price, quality and availability of the film. Once you start using formats which are now obscure or verging on obsolete you need to have commitment and a bottomless wallet. It seems like a shame to run a single roll through and then just put it on a shelf, but that’s what I imagine happens to most of these once people have had a go at using them. If you can afford decent quality film and an ongoing supply of it, then absolutely I recommend giving one a try. If you’re the budget conscious photographer looking to get into another format then I strongly suggest you start with any other camera which takes 120 roll film and see how you like it first.
Share this post: